So You Wanna Do It Yourself, Eh?
September 9th, 2008
So You Wanna Do It Yourself, Eh?
Published on September 9th, 2008 @ 11:43:35 am , using 746 words,
Reflections on September 2006
It all started with my seat. (No, the one on my bike - a 2006 Harley-Davidson Ultra Classic.)
The stock seat on my Ultra was fine for short rides, but it got uncomfortable after a few hundred miles in a day. So I got a new seat. Installed it myself in a few minutes. Easy. Little did I know what that change really meant.
The new seat moved my considerable backside at least an inch back on the bike. I now needed binoculars to see the handlebar. So, I decided to change the handlebar myself. Hey, how hard could it be? I'd removed the handlebar on my Sportster easily enough -- just 4 bolts on top. No big deal. Yeah, sure, you betcha.
So I got new handlebars and set out to put them on.
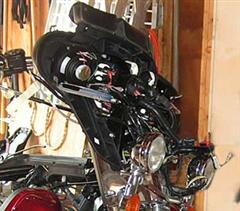
Step 1. Remove the windshield and front fairing. Okay, I knew that was coming.
Step 2. Remove the fairing cap. I had to look it up to see what it was! That little piece of plastic required removing the ignition switch and unplugging a wiring harness first.
Step 3. Remove the CB radio, then remove the regular radio. Translation: unplug the CB antenna, unplug the regular radio antenna, disconnect three wiring harnesses to the radios, disconnect three other wiring harnesses that are in the way, unbundle 15 wires, remove 18 screws (four of which you can't see), and remove a partridge from a pear tree.
Step 4. Remove brake and clutch controls. Check.
Step 5. Remove handlebar switches. Check. Have you ever removed the throttle grip and its origami-like tangle of control cables and electrical wires? I can now perform neurosurgery.
Step 6. Replace handlebar. Ah, at last. An easy part. Just four bolts (all of which are partially covered by the remaining fairings, requiring you to use all three hands to get to them).
Step 7. Install new throttle and idle cables. Okay, I guess I wasn't too surprised at that. Fortunately, they're a breeze to install. Just remove air cleaner. Then remove the seat and Tour Pak. Then the fuel tank; disconnect the crossover hose, gas feed line, center console, gas gauge wiring harness, fuel overflow hose, CB/Intercom wiring harness, three more bolts, and seven lords a leaping. THEN it's time to UN-thread the throttle and idle cables from the carburetor; but you can't see what you're doing unless you: a) have a very bright light, b) have several small mirrors, and c) are a contortionist. And that's just to SEE the cables. To actually disconnect the old and connect the new -- well, you have to pray for a miracle of Biblical proportions.
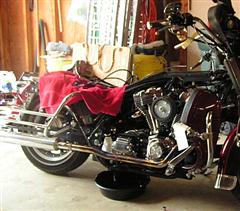 Who'd have thought that replacing the handlebars on a motorcycle would require the use of an oil drip-pan?!? |
Step 8. Get and install a new clutch cable. Okay, I didn't see that coming. But what's another new cable at this point? After all the work with the throttle and idle cables, I was READY for an easy task. Sure.
Step 8a. Drain the transmission fluid.
Step 8b. Remove rider and passenger floorboards.
Step 8c. Remove exhaust system. (No, I'm not kidding!)
Step 8d. Remove and disassemble an oriental puzzle of pieces inside the transmission side cover.
Step 8e. Put the new cable where the old one went. Easier said than done! Then reassemble that torture puzzle.
Step 9. Don't forget the new front brake lines. Drain the old brake fluid, replace all the lines, add NEW fluid, and then bleed the lines (doing that alone was like juggling bowling balls while crocheting a nice doily).
Step 10. Put all that stuff you took OFF back ON. So after several new gaskets, four rolls of paper towels, and an entire box of Band-Aids, my new seat (and all the rest) is finally in place.
One thing I've grown to appreciate more than ever -- that's the talent of the mechanics working at the shop. Next time you have any "simple work" done, don't complain about the labor cost. Those guys earned it!
By the way, I've got several pieces left over, if anyone's interested in spare parts. I also have one end of a wiring harness hanging down, but I'm sure I'll need it sooner or later.
It may have been easier just to get a new seat. (No, THIS time I DO mean MY seat!)
by a Very Disillusioned Do-It-Yourselfer
.....